There is a growing trend amongst digital photographers to use their digital SLR cameras to capture stunning high definition time-lapse films. I thought I would start to explore the process using my X-E1 camera but I would stress this post is not a presentation of work, the film at the top of the post is merely my first and very rough experiment.
This post documents my first attempt to capture a time-lapse video and process the images in Lightroom 4 to create a high definition time-lapse film.
Additional Hardware
If you want to explore this technique then in addition to a camera and tripod you are going to need an intervalometer. An intervalometer is a piece of hardware that all trigger your camera at a preset time interval. These range in price from around £15 through to over £100 if you opt for a wireless system. I have purchases the cheapest intervalometers I could find.
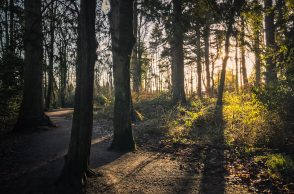
I also captured this still at the same time :

Intervalometer - X-E1
The X-E1 features a mic/release connector. I tested a canon remote release cable with the X-E1 and it triggered so I took a risk and purchased an intervalometer with the same Canon interface. This unit cost £19 and works perfectly. Click here for more information..
Tip : Rather than have your intervalometer dangle from your camera it is worth putting a little velcro / hook sticker on the back of the unit and on your tripod.
Shooting the time-lapse
With the X-E1 I am more than satisfied at the quality of the JPEG files (set at fine). When setting up the camera my aim was to reduce as many of the “autos” as possible. I took a few test shots to determine the optimum ISO, Aperture and shutter speed. For the time lapse at the top of this post I fixed the ISO, White Balance and Aperture and left the camera on Aperture priority. I found setting the white balance to Tungsten created a blue hue to the output.
I connected the intervalometer and selected a 20 second interval between captures. The basic rule is the faster the movement being captured the greater the frequency of capture. A busy city might need a photo every 1 second whereas capturing the stars and changes in light may need a photo every 20-30 seconds.
I focused the camera on a fixed object and set the camera/lens to ‘manual’. As the lapse developed a started to adjust the shutter speed and ISO. This is a skill I need to develop in that these adjustments are visible in the film. The aim would be to make these adjustments gradually. I went from a 1/280 f/2.8 at ISO200 to 20 seconds, f/2.8 ISO1600, I have probably jumped in with too complicated a setup for my first attempt though. In effect the time-lapse becomes a series of long exposure photographs.
Importing your Time-Lapse Images
I created a new Lightroom catalogue as I don’t want my main catalogue filled with hundreds of images and I wanted to delete the time-lapse images once I have exported a ‘satisfactory’ time lapse film.
Presets & Batch Processing
Once I had imported the image files I took the first image and did a little bit of development treating it as if it was a single still. I applied one of the Long Exposure Lightroom Presets to the series of images and made a few adjustments. Once I had finished the edit I was able to sync the process across all the images in the catalogue.
Slideshow Presets
If you attempt to create a time-lapse you are going to need a video preset for the slideshow module to enable you to export your image catalogue as a film. One of the most popular presets are the LR Time-lapse presets these offer both a range of frame rates and range of video resolutions.
Now that all the images were in Lightroom the next stage is relatively simply. I selected all the images and created the film using the desired preset (I opted for 720p footage at 24frames per second).
I then brought this exported video file into Final Cut to add the credits and fade in/out. I was very aware of the camera getting cold and the risk of condensation so I kept the night time shots as short as I could. I will explore some sort of camera body warmer for future lapses.
Test Two
In Conclusion
In conclusion I am at the bottom of a steep learning curve but I was impressed at the performance of the X-E1 and want to explore the technique further. I realise I have to be aware of battery live so kept a battery on charge for quick change over. Initially I thought changing the battery would ruin the lapse as the camera would change position but I have decided that the camera sitting in a single stationary position isn’t interesting.
I think I have the post production side of things covered so the next step is to master the capture process and then it is time to find some interesting locations to do a proper testing. If you have explored this technique and have any tips please post away in the comments, all advice would be greatly appreciated.